Quick Guide to Installing SQL Server 2014
Problem
What is the basic process to install SQL Server 2014? Can you walk me through the steps?
Solution
In this tip, we will demonstrate the installation of SQL Server 2014 on a notebook. While processing large amounts of data on a system like this might not be feasible, one can still learn how to configure and use the features of SQL Server 2014.
Note: Before starting make sure you are connected to a network and have Internet access.
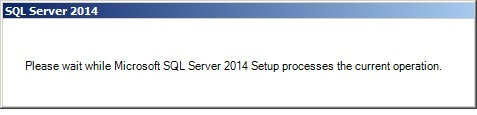
After launching the setup application, the following pop-up window might appear. It might appear several times throughout the installation process.
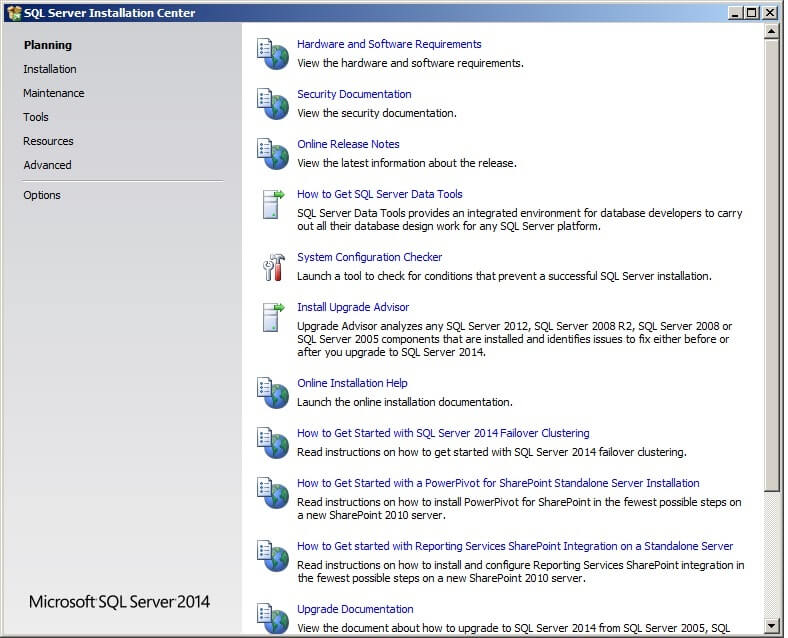
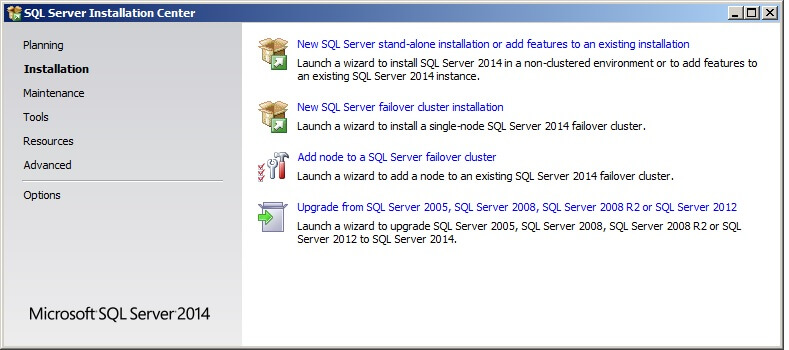
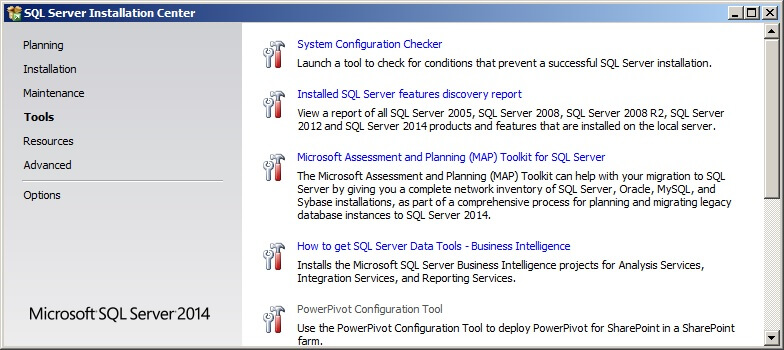
The SQL Server Installation Center window will display. Along the left side of the window are the categories showing how the SQL Server Installation Center is organized. On the right side of the window are different actions the installer can take. Notice that some of the items allow the installer to view documentation while other items will make changes to the system. By the default the Planning category is displayed.
Clicking on Installation on the left side will display the different installation options. For this tip, we will click on "New SQL Server stand-alone installation or add features to an existing installation". This will launch the SQL Server 2014 Setup application.
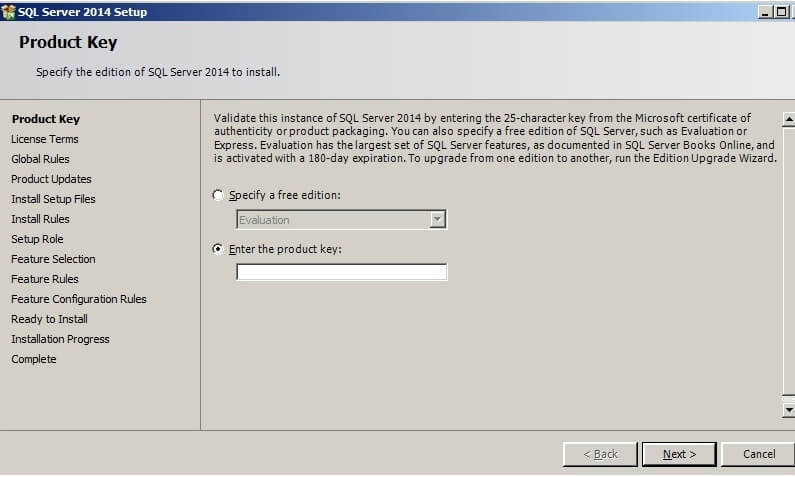
The SQL Server 2014 Setup application lists the steps it will follow on the left side of the window. Enter the product key and click "Next >".
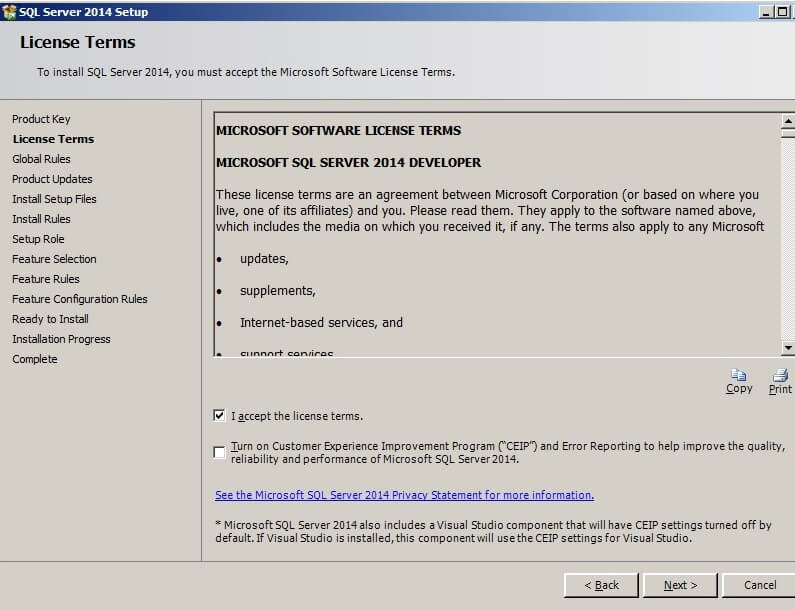
Review the license terms, click on "I accept the license terms", and then click "Next >".
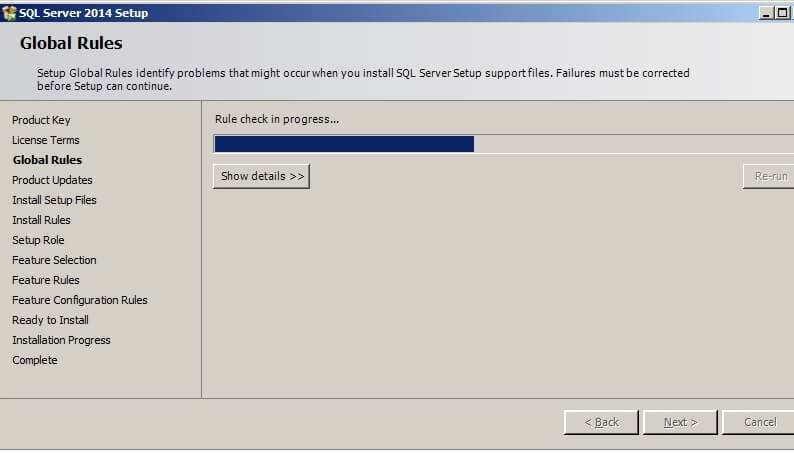
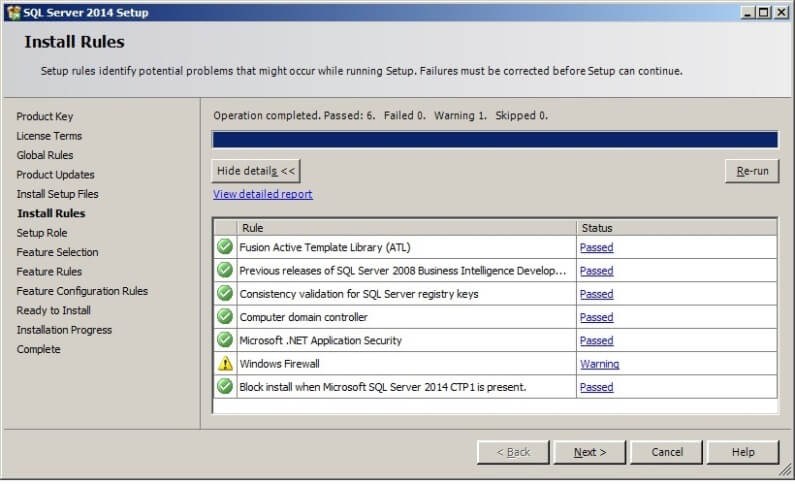
The SQL Server 2014 Setup application will run multiple checks for rules during the installation process. If a rule check fails, the setup application will provide the corrective measures to take so installation may proceed. The setup application will also search for product updates.
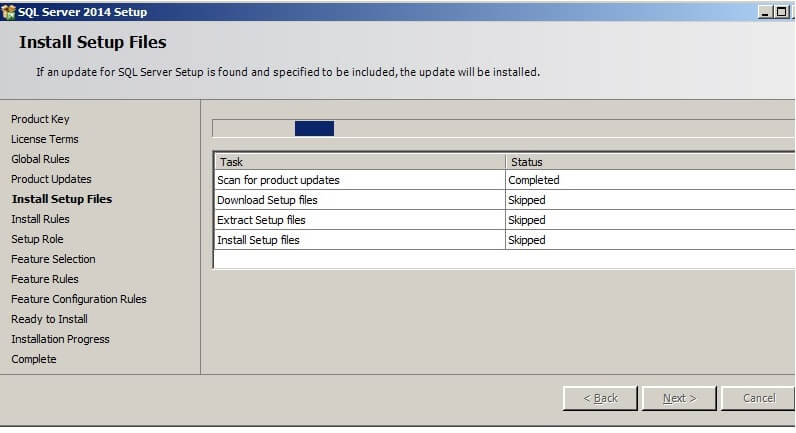
The setup application will download, extract and install files needed to carry out the installation process. Click on "Next >" to continue.
Another rule check will be run to ensure everything is in place so the setup will be successful. If a rule check fails, the setup application will provide the corrective measures to take so installation may proceed. Click on "Next >" to continue.
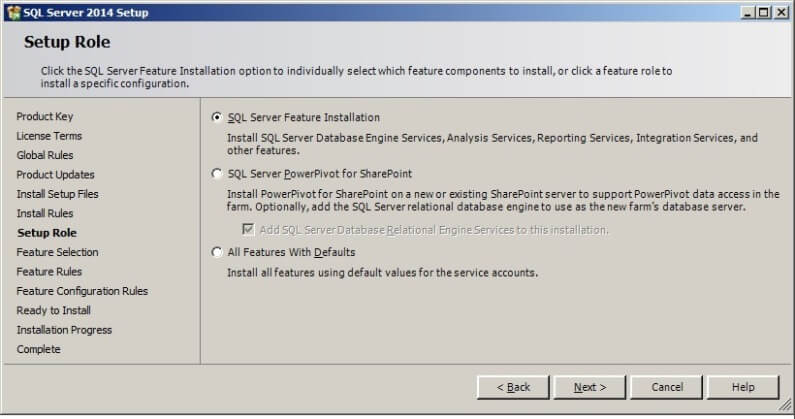
On the Setup Role screen, we will click on the SQL Server Feature Installation radio button. This will allow us to install the database engine, Analysis Services, Reporting Services, Integration Services and other features of SQL Server 2014. Click on "Next >" to continue.
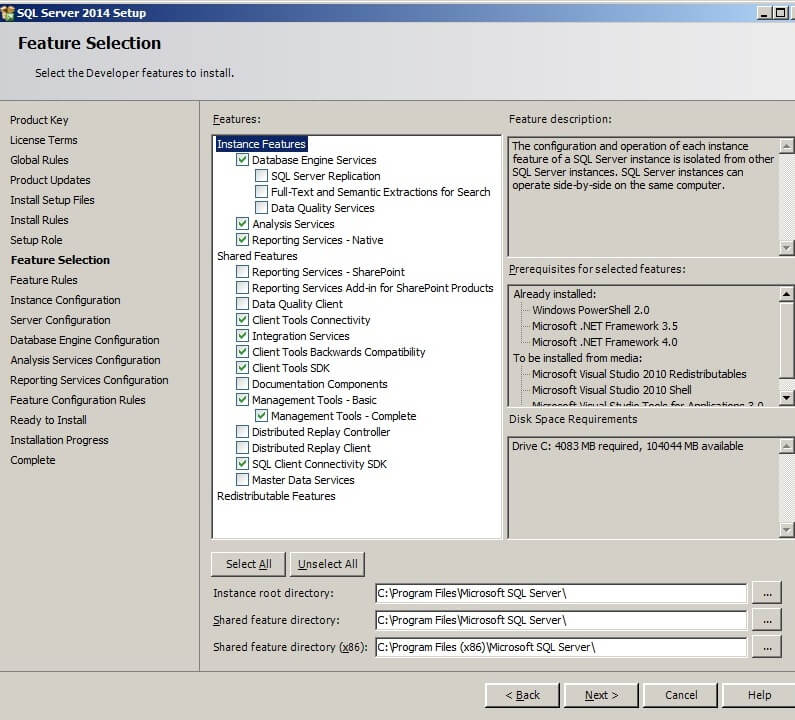
The next step is the feature selection. This allows the installer to pick and choose the features to be installed. On the right side of the window, the disk space requirements are displayed. At the bottom, the installer can choose the path for the instance root and shared feature directories. Click on "Next >" to continue.
Sometimes a "Please Wait..." pop-up box might appear.
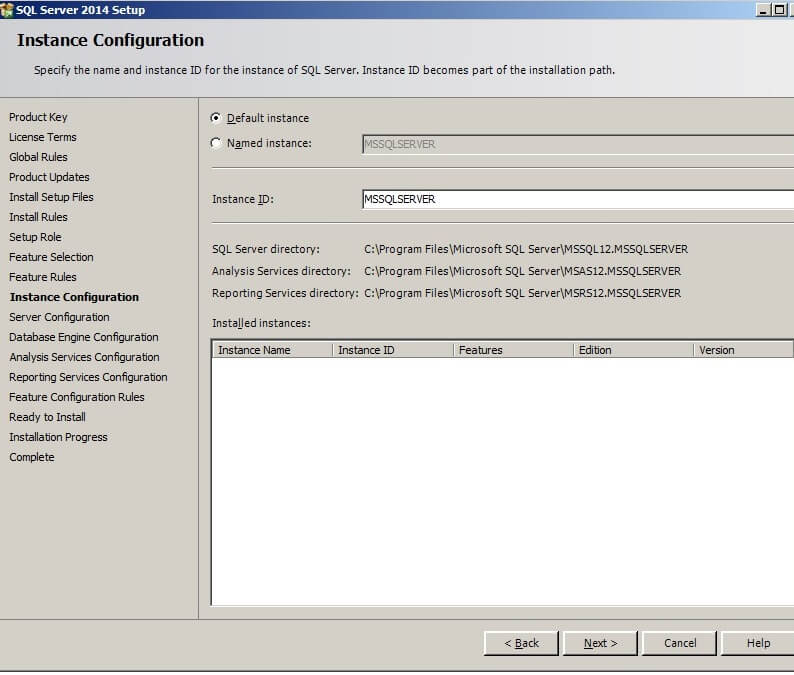
The Instance Configuration screen allows the installer to specify the name of the instance and its ID. This screen will also display other installed instances.
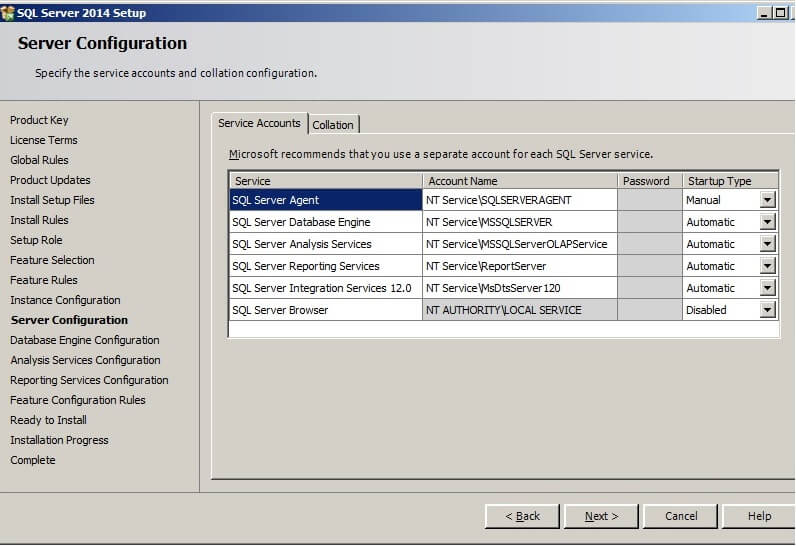
The Server Configuration screen shows the services to be installed, the service account name and the Startup Type. If you are installing SQL Server 2014 on a device with limited resources then the Startup Type should be set to Automatic (Delayed Start). Click on "Next >".
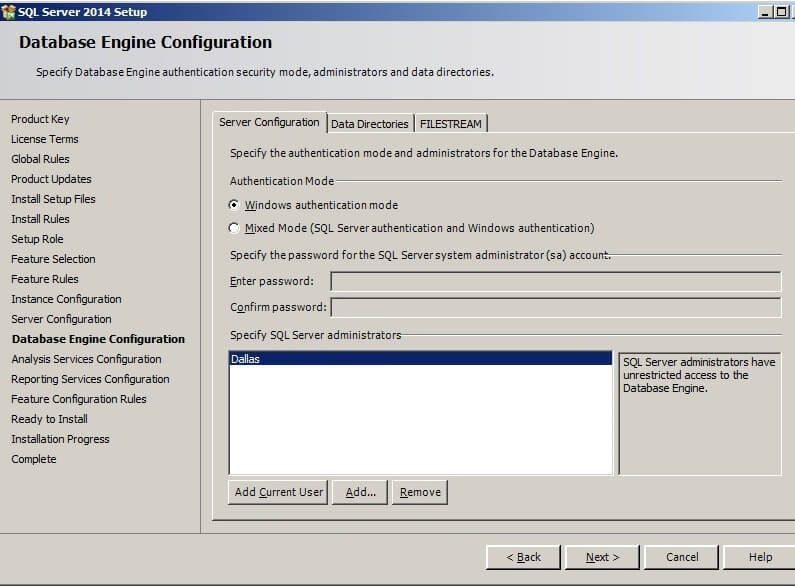
On the Server Configuration tab of the Database Engine Configuration screen, select your preferred Authentication Mode and specify your SQL Server administrators.
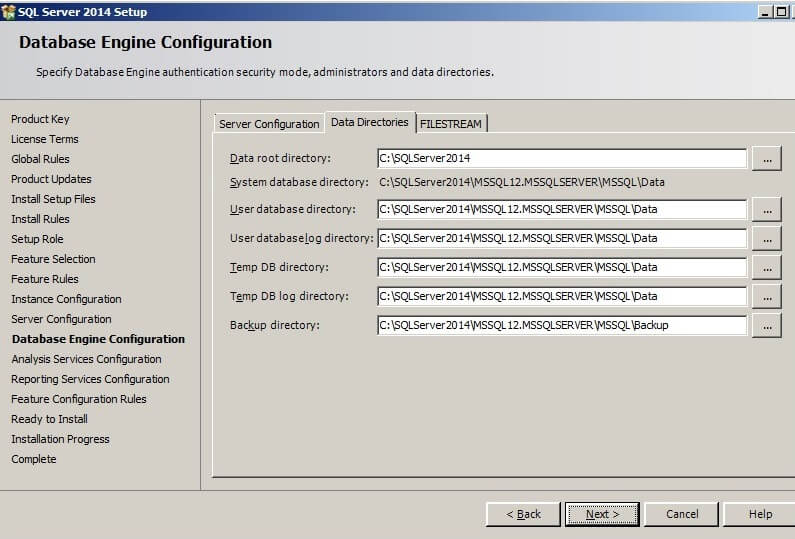
On the Data Directories tab of the Database Engine Configuration screen, specify your preferred directories for the data root, system database, user database, user database log, temp database, temp database log, and backup. Click on "Next >".
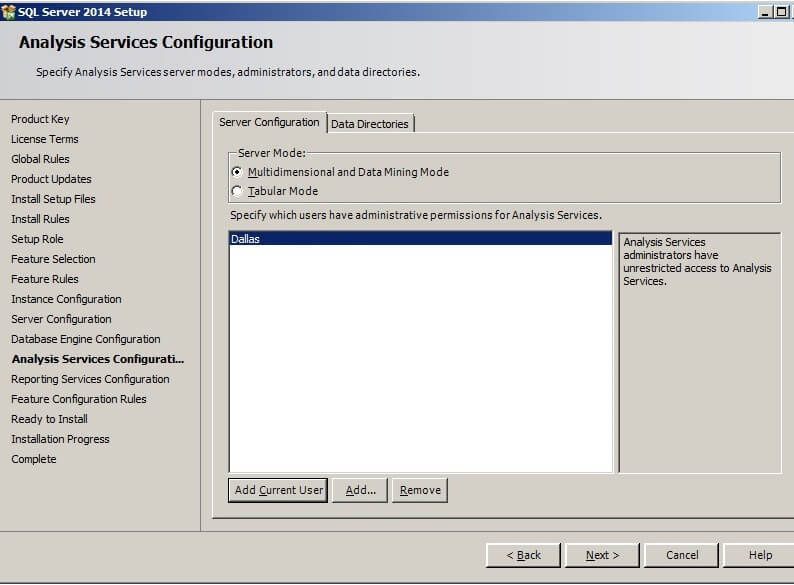
On the Server Configuration tab of the Analysis Services Configuration screen, select your preferred Server Mode and specify your Analysis Services administrators.
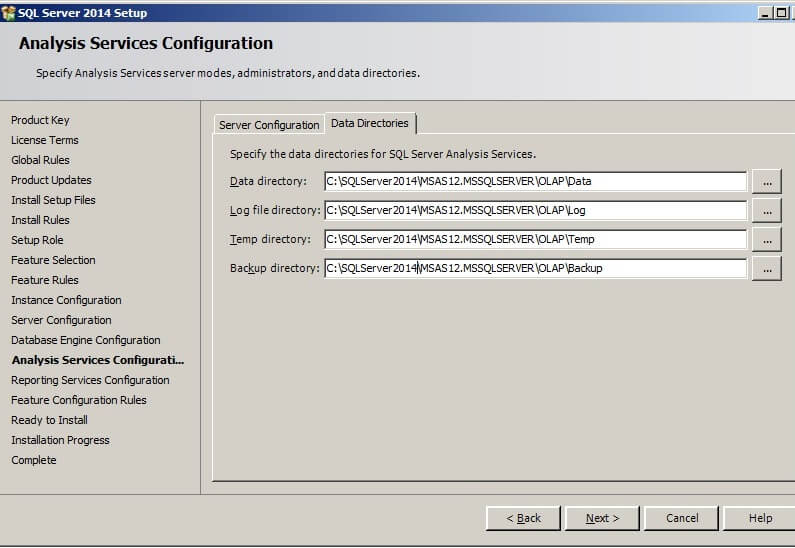
On the Data Directories tab of the Analysis Services Configuration screen, specify your preferred directories. Click on "Next >".
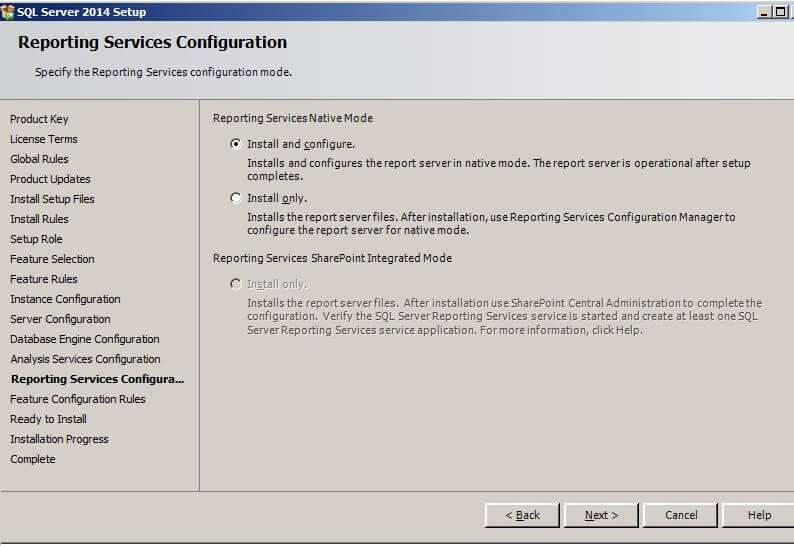
On the Reporting Services Configuration, select Install and configure. Click on "Next >" to continue.
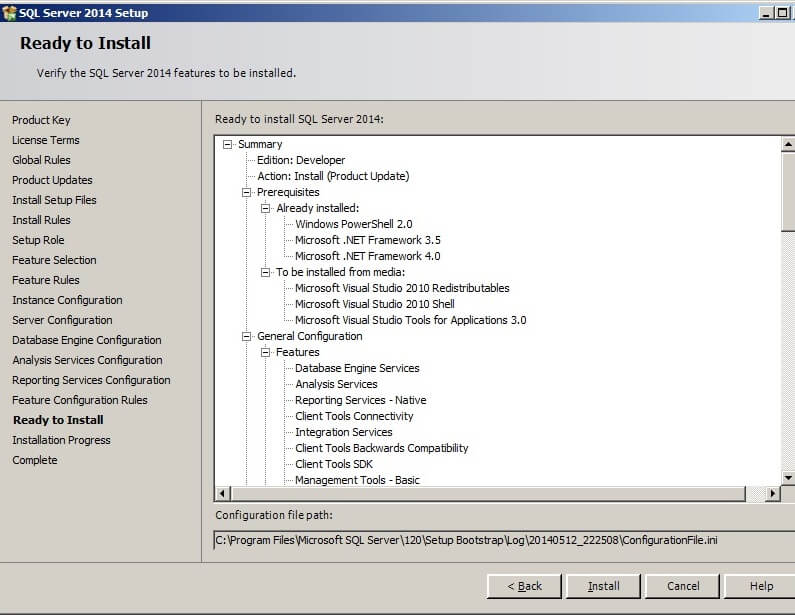
The Ready to Install screen displays all of the features and prerequisites to be installed. At this point, the installer can still go back to make changes or quit the process. Click on "Install" to begin the installation of the SQL Server 2014 components.
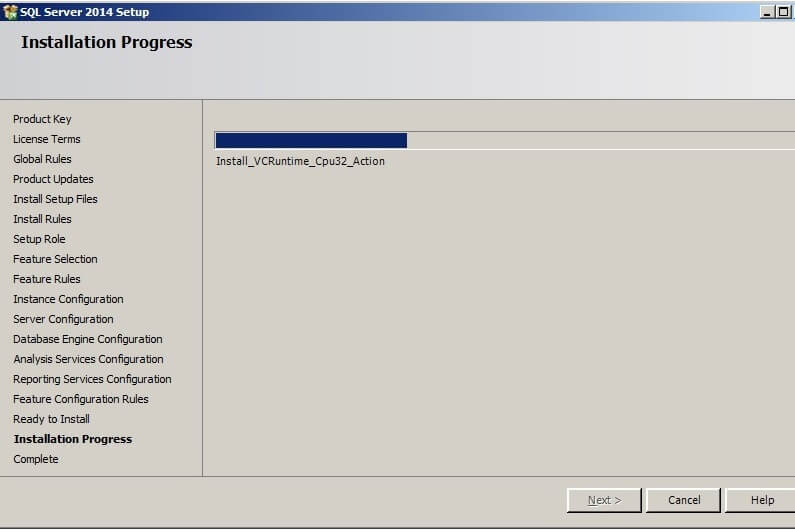
The installation progress bar tracks the status of the installation.
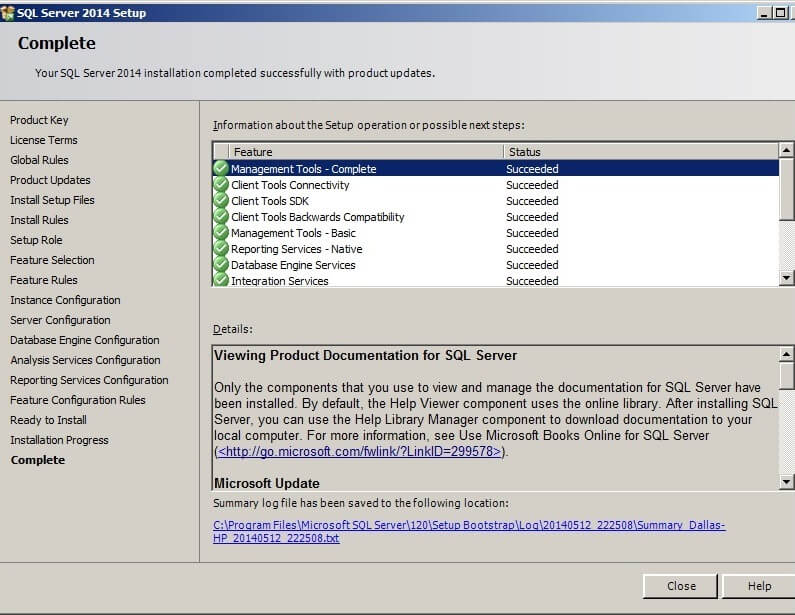
Upon completion of the installation, click on "Close" to exit the SQL Server 2014 Setup.
The SQL Server Installation Center can now be closed.
Next Steps
It is a good idea to reboot and run Windows Update to allow updates to be installed. Please check our collection of other SQL Server 2014 tips on MSSQLTips.com that are listed below.
SQL Server 2014 Tips
What"s new in SQL Server 2014? Is it worth the upgrade?
Last Update: 5/29/2014
About the author

Dr. Dallas Snider is an Assistant Professor in the Computer Science Department at the University of West Florida and has 18+ years of SQL experience.
View all my tips
More SQL Server Solutions
| Friday, June 12, 2015 - 5:11:33 PM - Dave |
Back To Top |
|
I guess they assume that you know and understand what all of the "features" are when it comes to the "Feature Slection" part of the installation. There does not appear to be a "typical" or "basic" option that selects only the most common features for you. Absent that, and absent knowledge of what all of that stuff does, the only option seems to be to do a full/select all installation.
|
| Tuesday, September 23, 2014 - 4:17:53 AM - Thomas Franz |
Back To Top |
|
@SAinCA: If you want to change the user / account that will be used by the SQL Agent / Assistant ... you must not use the usual Windows services console because it will not set the additional rights that will be necessary.
For this reason you have to use the SQL Server 2014-Configuration-Manager to change the user after the installation.
|
| Monday, June 09, 2014 - 9:44:46 AM - Patrick |
Back To Top |
|
SAinCA, my answer for everything is generally "it depends on your environment," but my general thoughts are that if it were up to me, I"d suggest a few more than just one. I personally like using 6 domain users: one for the DB Engine (main SQL Server), one for SSAS, SSIS, SSRS, and last two are the SQL Job Agent, and the SSRS Report Execution user. If the environment is one where there is need to move around the network, like moving backups to a file share, or having the SQL Agent run a batch script on another server, this should do just fine.
If the server is almost entirely a standalone which doesn"t need other resources or services, you could get by with creating a local user with an account the lowest essentials possible. Also worth noting, that if you go this route, the account does not have to be an administrative account, just remember to give it access to the files and folders you"ll be using, you"ll get errors if you put the Backup, Data, Log, and TempDB files in places where SQL Server can"t access them.
|
| Monday, June 02, 2014 - 2:36:07 PM - SAinCA |
Back To Top |
|
I noticed you used the NT SYSTEM\ default accounts for all but one component, but many "Best Practices" commentators recommend using at least one domain account, domain\sqlsvc, for at least the SQL Server Service, Analysis Services and SQL Server Agent.
Do you have any insights on this, and if so, what one would need to instruct a "SQL Server knowledge-lacking" corporate I.T. Admin when setting up the domain account as I understand that once given the account, the installer makes some privilege setting changes automatically?
We"re setting up three servers as I write, so getting the correct verbiage in the hands of I.T. is super-important.
Thanks in advance.
|


Source
https://blog.jordanhopfner.com